Integration Guide
Authentication
DeepDecision® uses JWT tokens for authentication. When requesting an access token you need to provide your issued client_id and client_secret. On a successful request, this will provide a temporary access token that has limited time-based access to our resources. The length of the token (in seconds) will be returned to the client as part of the response. Once this token has expired, to continue accessing our services a new access token needs to be requested.
A new access token should not be requested for every request to our platform
If the access token has expired and is still being used for API requests a HTTP 401 - Unauthorized will be returned. Should this happen, a request for a new access token should be issued.
Authentication Request
Generating an access token requires a POST request to our authentication server. It is recommended that the access token is proactively refreshed to limit errors on API requests.
Authentication example request can be found here.
Authentication Response
TThe authentication response includes the access token to be used in subsequent requests to DeepDecision®
Authentication example response can be found here.
In each subsequent request, you must pass the 'Authorization' header with the bearer access_token
Decisions
The decisions service utilizes a web socket that indicates which events to capture and send next to the DeepDecision®. When creating the web socket you will be required to send the name of the recipe to use and a uniquely generated UUID called a reference.
The recipe contains information about the events required to generate a decision. All accounts will be provisioned with a Demo Recipe called simulated-identity-check that will allow you to validate your integration with the platform and get to understand the Decision lifecycle. Please ensure that when using this recipe you correctly populate the Decision's recipe attribute with the value simulated-identity-check. This recipe requires a PERSONAL_DETAILS event. What is required for this event can be seen below.
Once all events have been submitted the decisions service will return a PROCESSING signal. Once it deems enough information has been sent to satisfy a decision it will return a complete status.
Decision lifecycle
This how the decision lifecycle looks when using the REST API's
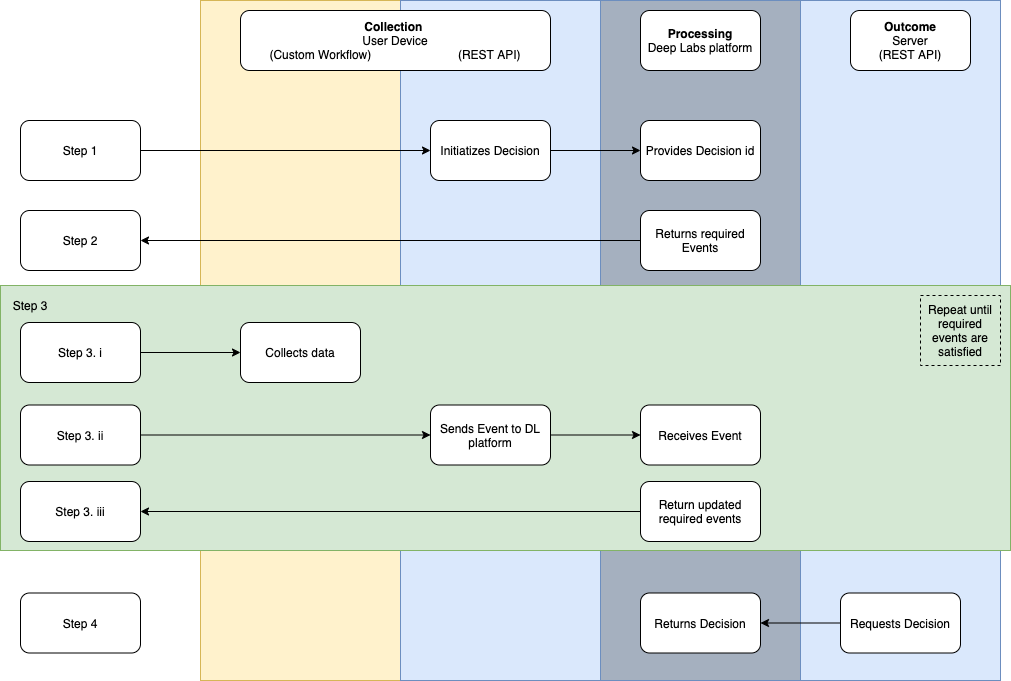
You can see from the Collection of data has been expanded. This is because you now need to create your own UI to capture the data.
Collection: Collection has 2 components when using the REST API's. You must design your own UI to capture the required data and then send the data to the DeepDecision®
Processing: processes the data sent to the platform and uses it to create the outcome.
Outcome: Your server must ask the platform for the outcome.
Sample Decision Lifecycle
This is an example of a Decision lifecycle. This is how to integrate your system with the DeepDecision®.
Opening events web socket
Websocket stays open during the lifecycle duration.
When opening the web socket you first must generate a unique UUID called a REFERENCE. To open the connection you must pass the REFERENCE and RECIPE which you want to use to create a decision.
Web socket events
| Events | Description |
|---|---|
| connected | web socket is connected |
| decision_event_received | an event has been received relating to the decision's reference |
| decision_processing | decision is currently processing, wait on further instructions |
| decision_collection_complete | decision has been made, you can now request the decision score |
| new_decision_error | An error has occurred with this decision, please restart the process |
| disconnect | you have been disconnected from the web socket |
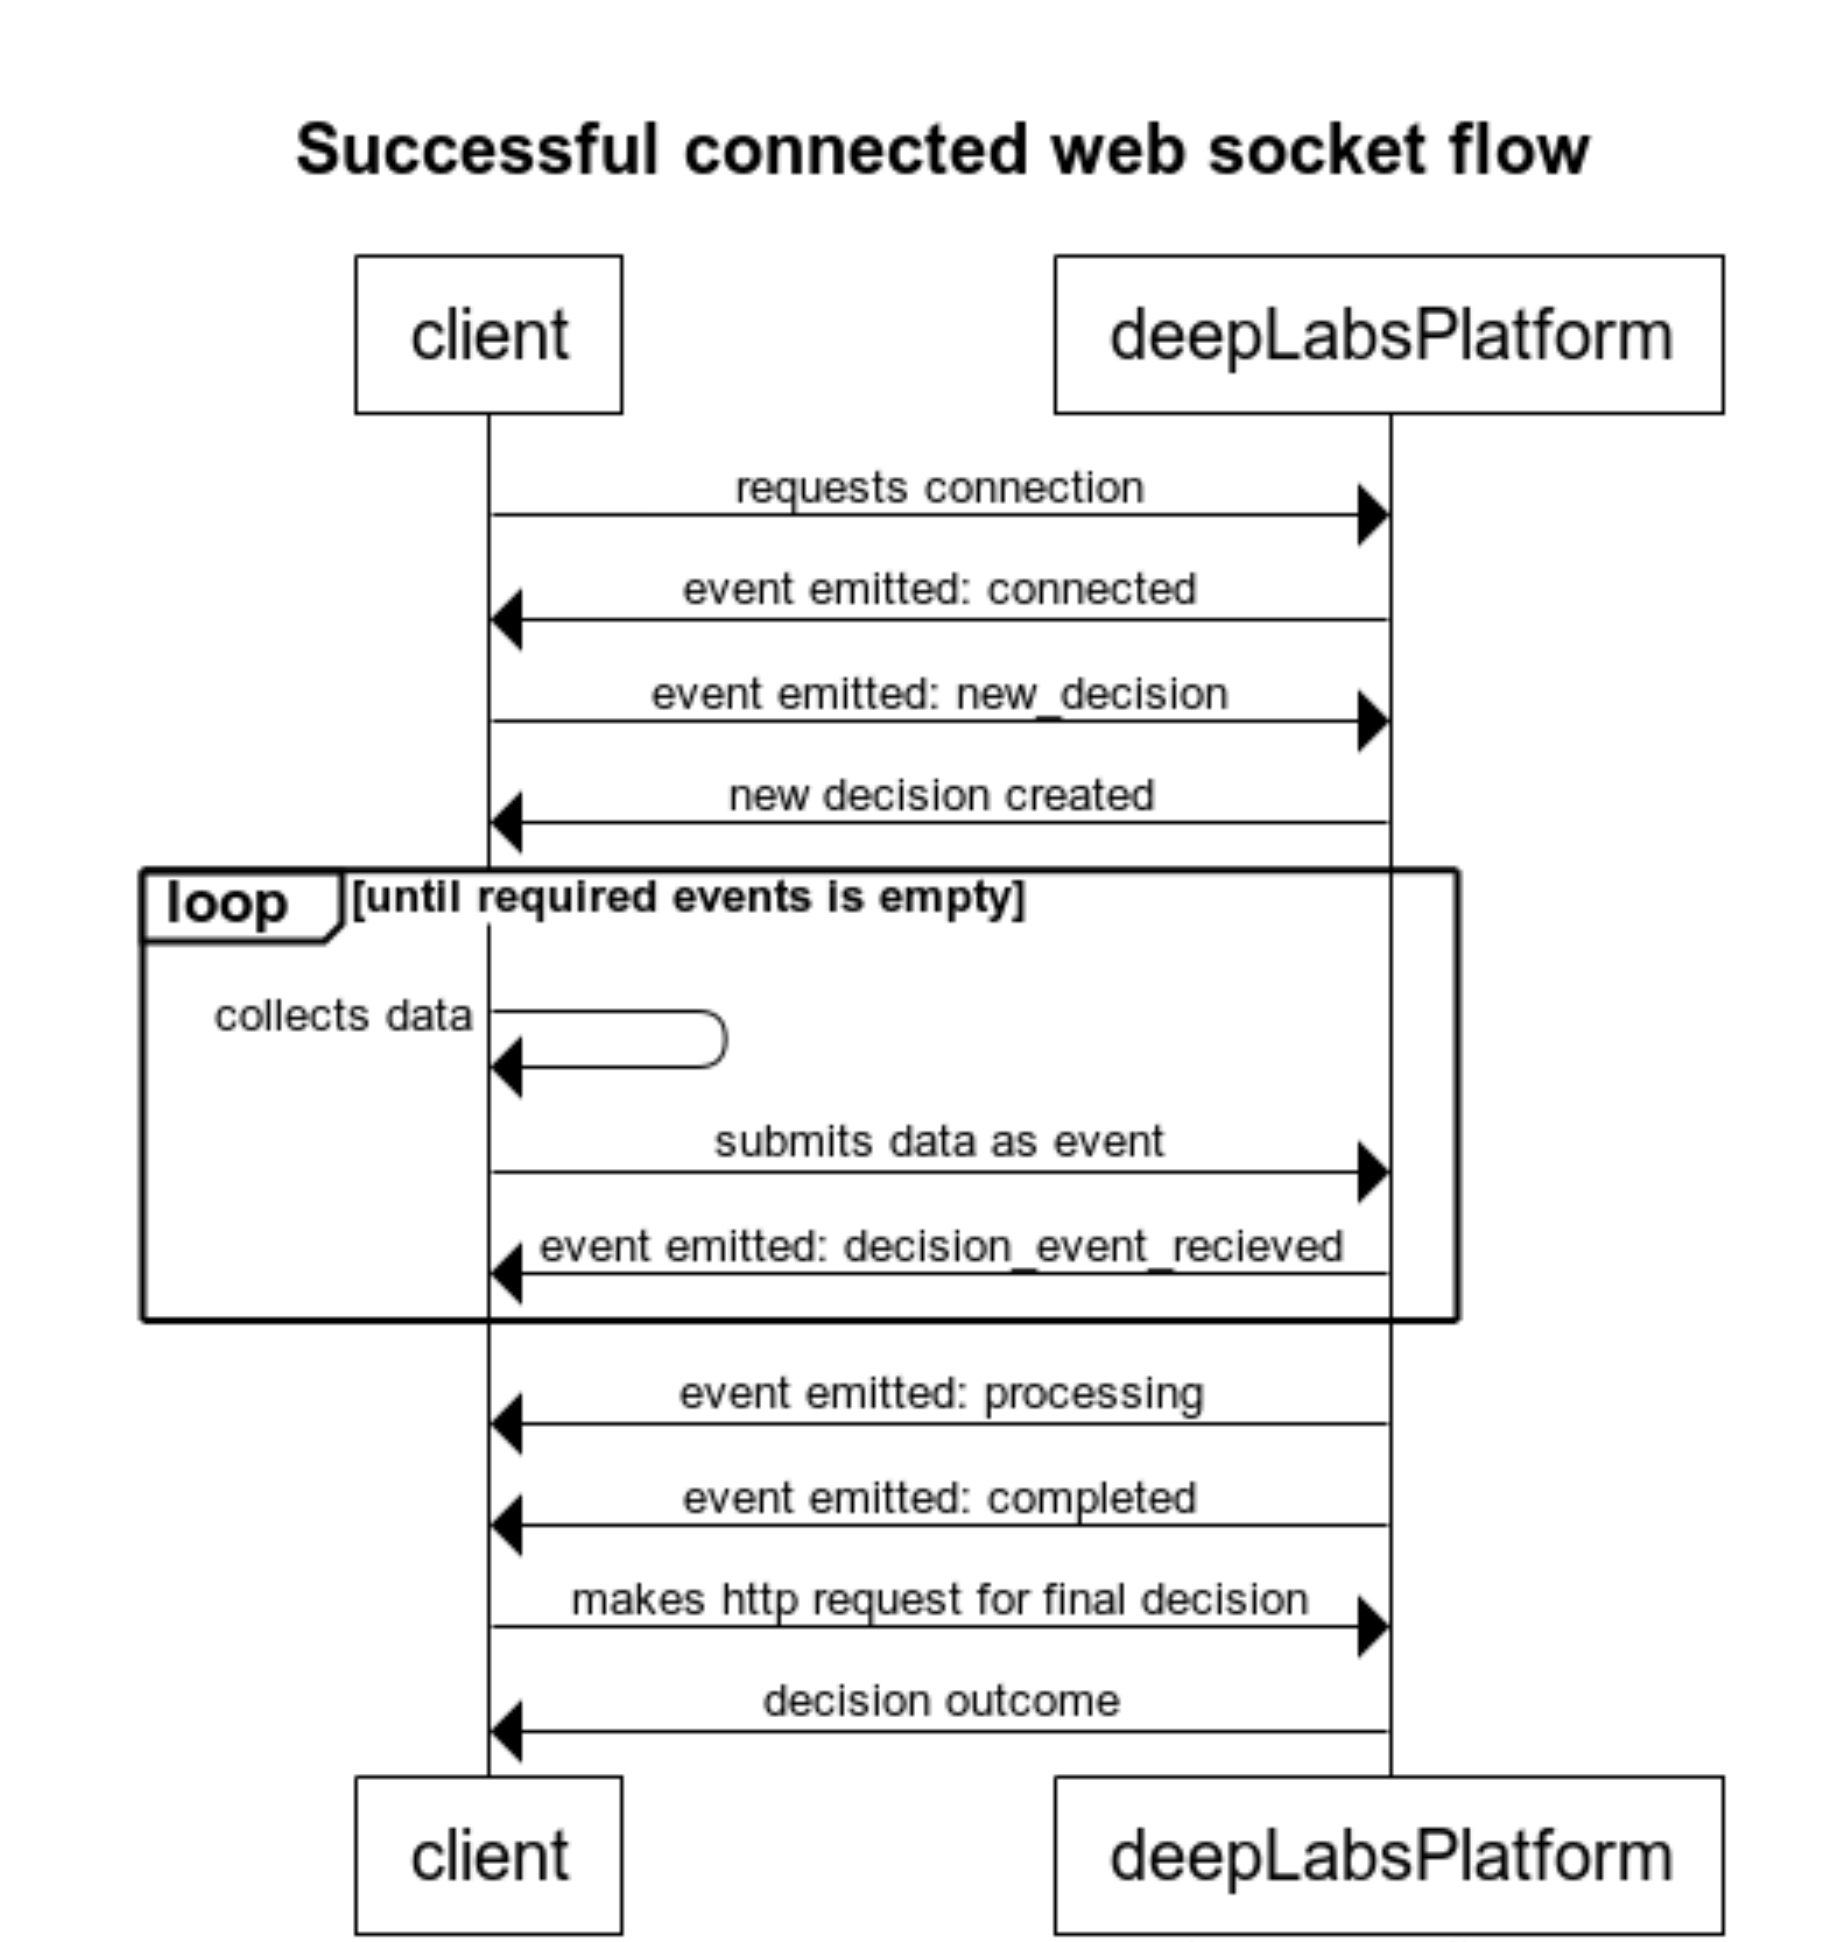
This diagram demonstrates the web socket flow. It shows how a connection is create, the web socket events emitted from the DeepDecision® with data and requests to be submitted by the client.
Initial web socket state
Initial web socket state shows we need 3 events
{
  "id": "9942180d-671f-43b8-a9d7-2699fc598293",
  "receivedEvents": [],
  "reference": "b16fe333-a798-493c-9504-69b71cf9f804",
  "requiredEvents": [
    "IDENTITY-DOCUMENT",
    "SELFIE",
    "PERSONAL-DETAILS"
  ]
}
Submitting events
Once the list of events has been received you need to capture the data requested and send them to our events API.
Each of the events has a different body of information to be submitted, each of these can be found in the API guide.
Remember that when submitting events you must include the same REFERENCE you used to create the web socket connection.
This section will show how the web socket collects data and the HTTP requests used. After each submission, we will show the current output of the web socket to decisions.
IDENTITY-DOCUMENT Submission request
We now need to submit the next event in the array. In this case, it's IDENTITY-DOCUMENT
An IDENTITY-DOCUMENT event submission example can be found here.
Decisions web socket after the second submission
Decisions web socket now shows we have two events submitted and that it is waiting on one further event before making a decision.
{
  "receivedEvents": [
    "SELFIE",
    "IDENTITY-DOCUMENT"
  ],
  "requiredEvents": [
    "PERSONAL-DETAILS"
  ]
}
PERSONAL-DETAILS Submission request
Next, we send the final event to the platform.
If using the demo Recipe simulated-identity-check the following attributes will need particular values to simulate the score returned.
To simulate a good score use;
| Attribute | Value |
|---|---|
| detail.data.firstName | any name e.g. Joe |
| detail.data.lastName | any name e.g. Bloggs |
To simulate a poor score use;
| Attribute | Value |
|---|---|
| detail.data.firstName | Jane |
| detail.data.lastName | Doe |
Decisions web socket after all events submitted
Shows that all required events have now been submitted.
{
  "receivedEvents": [
    "SELFIE",
    "IDENTITY-DOCUMENT",
    "PERSONAL-DETAILS"
  ],
  "requiredEvents": []
}
Once each of the events has been submitted the web socket goes into processing and when the server has enough information to satisfy a decision, it will then move to complete.
Getting the Decision
Once a complete signal has been received you will need to make a request for a decision.
This should be done on your server side and then only communicated to your app when required.